Formatting Project Documentation
First impressions count — examiners mark hundreds of projects. Proper formatting gives your document a professional, polished appearance, making it easier for them to navigate your Analysis, Design, and Testing sections.
Learning Objectives
- 12.2.1.1 Use headers and footers when documenting a project
- 12.2.1.2 Use footnotes when documenting a project
- 12.2.1.3 Use tables when documenting a project
- 12.2.1.4 Set page parameters when documenting a project
- 12.2.1.5 Set page numbers when documenting a project
- 12.2.1.6 Set indents and line spacing when documenting a project
Conceptual Anchor
The Blueprint Analogy
An architect's blueprint follows strict standards: exact margins, scale, and labeling conventions. If every architect used different standards, builders couldn't read each other's plans. Similarly, document formatting standards ensure your project is readable, professional, and universally understood by examiners.
Part 1: Page Parameters & Structure
Adjusting page margins, orientation, paper size, and layout is the first step. You must set these before you start writing.
| Parameter | Standard Setting |
|---|---|
| Page Size & Orientation | A4 (210 × 297 mm), Portrait. (Use Landscape for wide tables/diagrams only). |
| Margins | Top/Bottom: 2 cm, Right: 1.5 cm. Left: 3 cm (The left margin is wider to allow room for physical binding). |
| Font & Alignment | Times New Roman 12pt or Arial 11pt. Alignment should be Justified. |
| Heading Styles | Use MS Word styles (Heading 1, Heading 2). This ensures visual consistency and is required to automatically generate a Table of Contents. |
How to Set Page Parameters
In MS Word: Layout → Page Setup (margins, orientation, paper size). In Google Docs: File → Page setup. Set these first!
Part 2: Navigation (Headers & Footers)
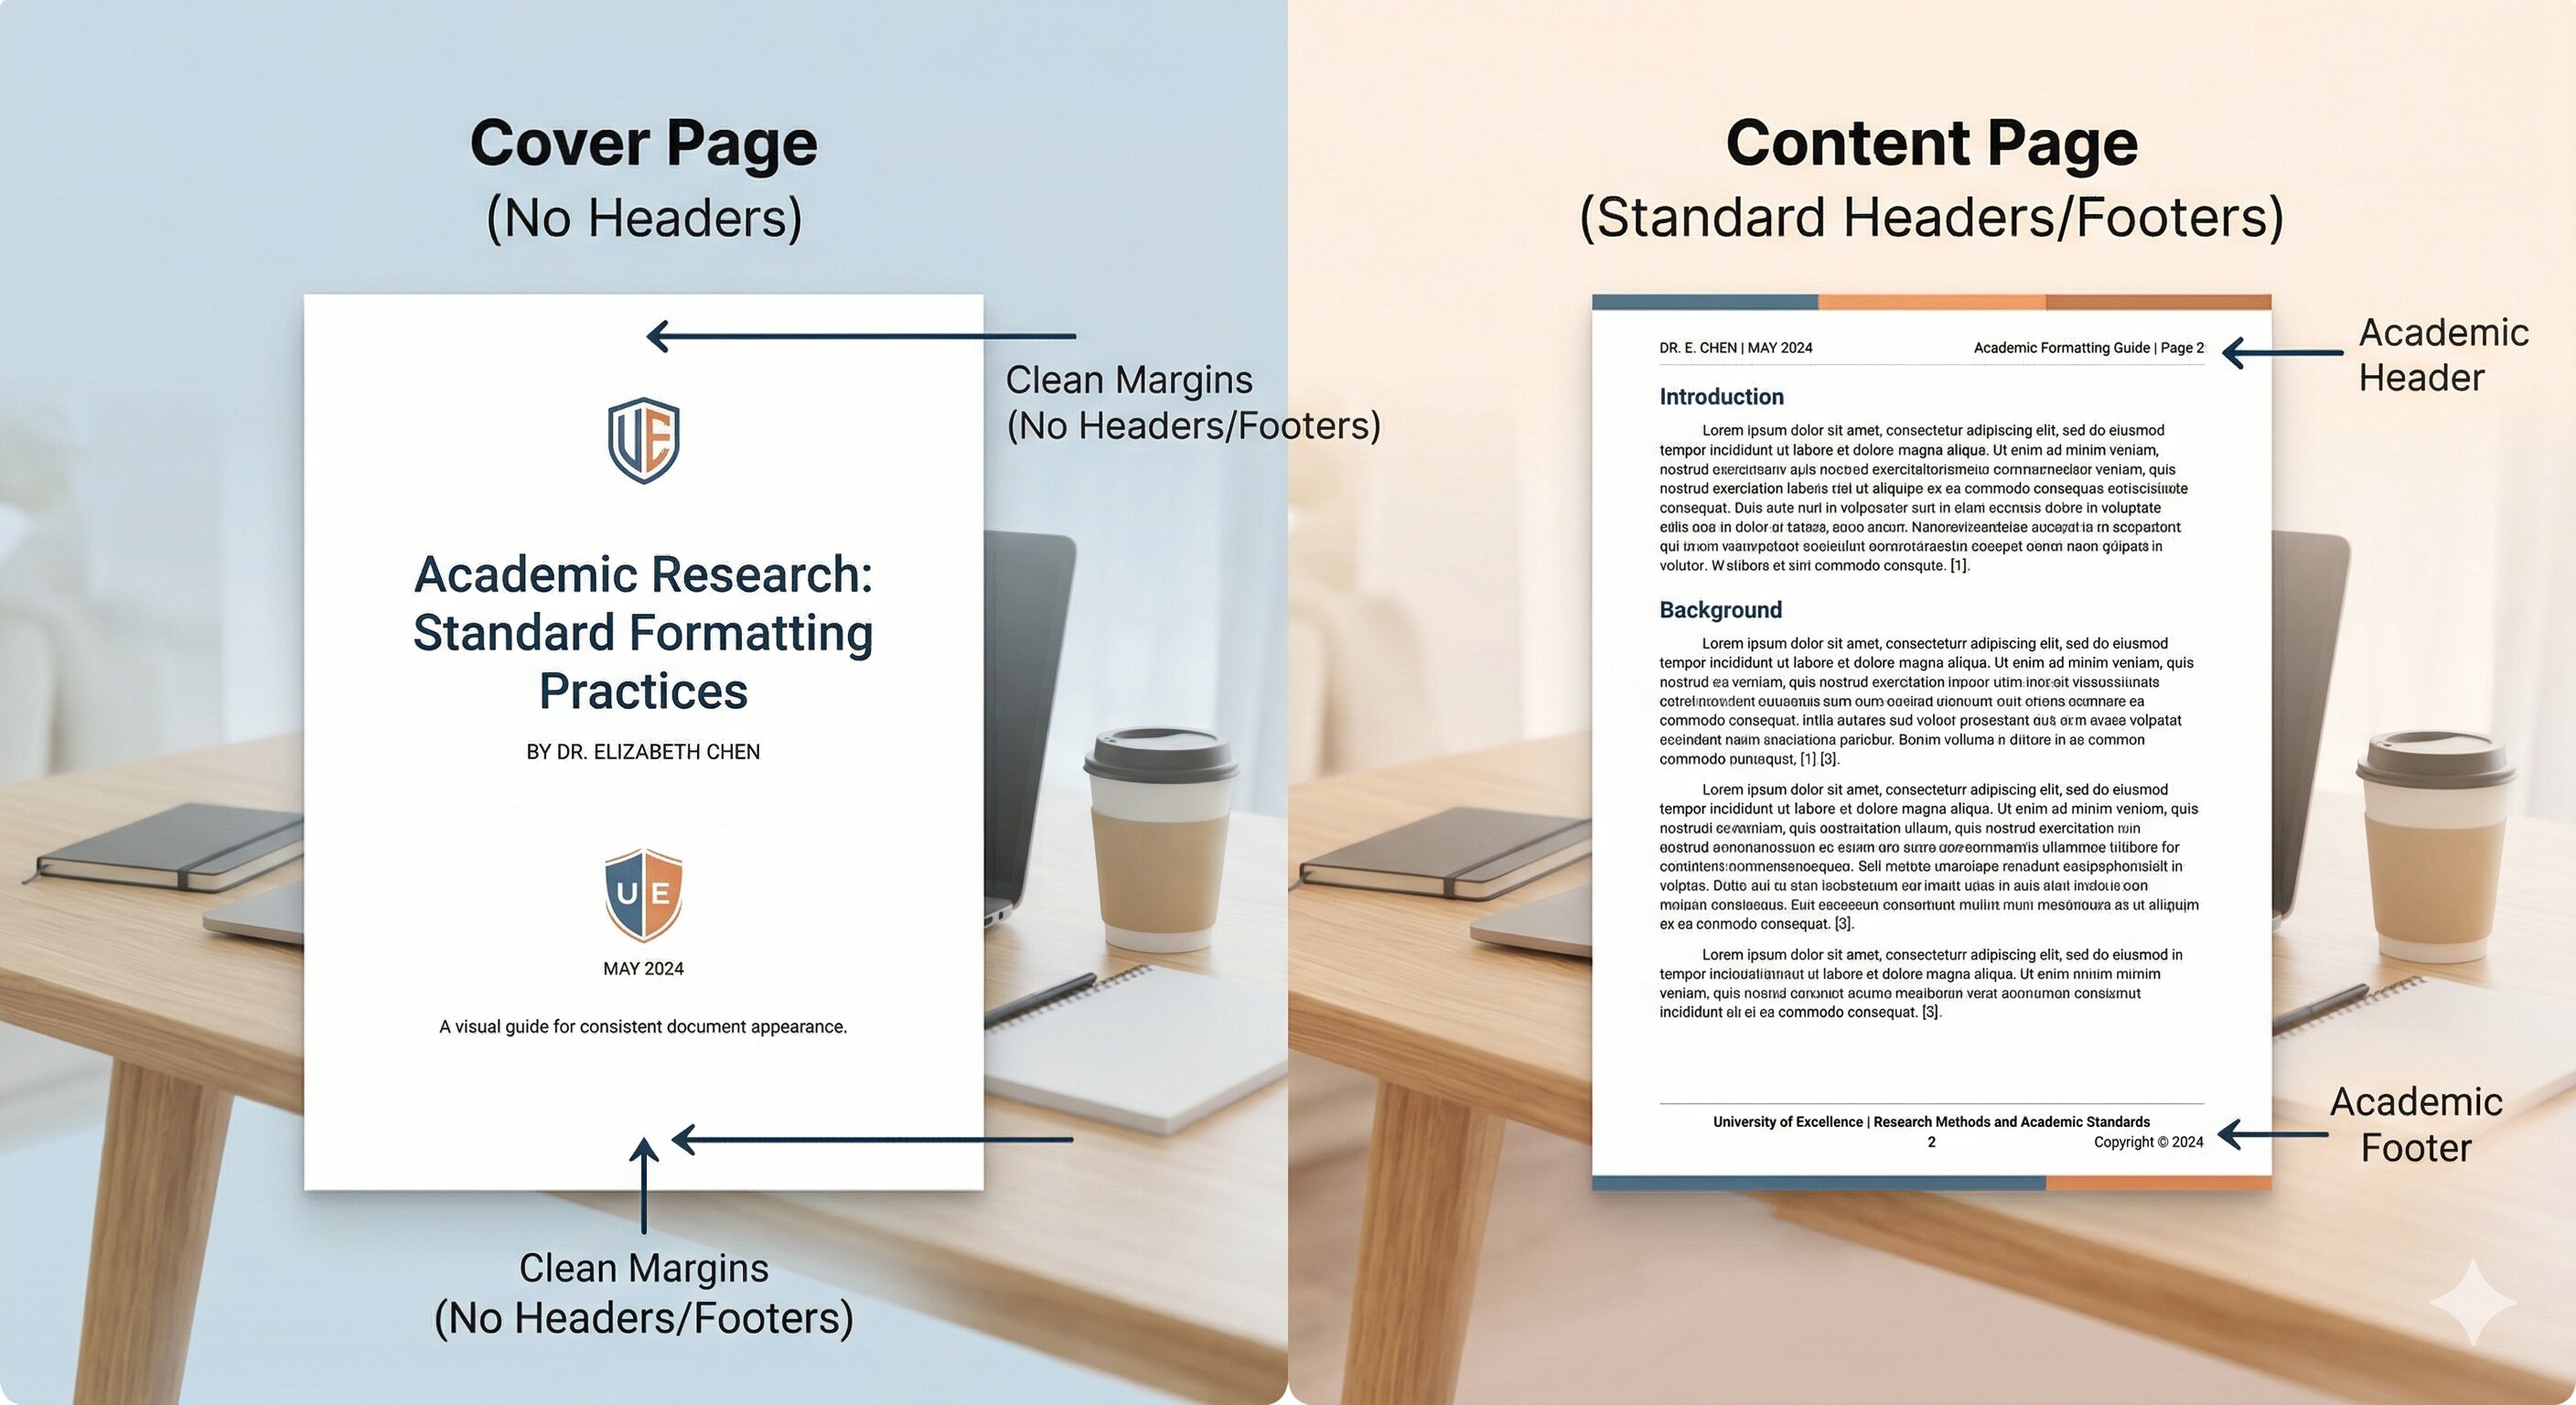
Header: Text at the top of each page. Footer: Text at the bottom of each page. They provide consistent context, aid navigation, and prevent plagiarism by putting ownership info on every page.
- Typical Header: Project Title, Chapter/Section Name (e.g., "NIS Database System – Normalization").
- Typical Footer: Candidate Name, Center Number, Candidate Number, and Page Number.
- Different First Page: The cover page must NEVER have a page number or header. Enable the "Different First Page" setting to suppress navigation on the title page.
- Page Numbers: Usually placed in the bottom center or right. Begin numbering from page 2.
Part 3: Referencing & Data Presentation
Footnotes & Endnotes
| Feature | Definition & Purpose |
|---|---|
| Footnotes | A note at the bottom of the page for extra info, references, or clarifications. A superscript number links to the bottom. Adds detail without disrupting text flow. |
| Endnotes | Similar to footnotes, but they appear at the very end of the document (or end of a chapter). |
Using Tables
Tables organize structured data cleanly. In Cambridge AS/A Level documentation, you will primarily use tables for comparing hardware options, displaying Data Dictionaries, and creating Test Plans.
Part 4: Indents & Line Spacing
Proper spacing prevents dense walls of text, making the document easier for the examiner to read and annotate.
| Parameter | Standard Setting |
|---|---|
| Line spacing | 1.5 lines (Standard for academic documents). |
| Spacing Before/After | Spacing before: 0pt. Spacing after: 6pt (Adds breathing room between paragraphs). |
Types of Indents
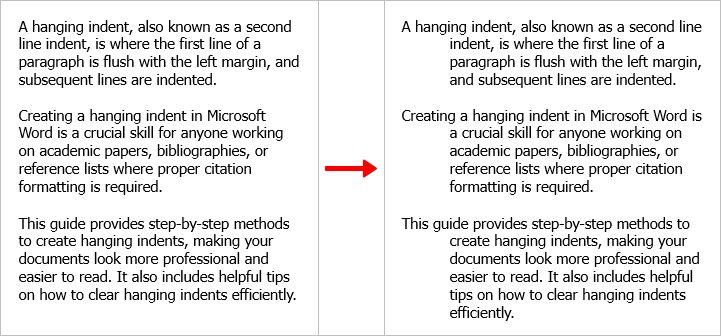
- First-line indent: Only the first line of the paragraph is indented to the right (standard setting is 1.25 cm).
- Hanging indent: All lines except the first line are indented. Often used for bibliographies or bulleted lists.
Quick Formatting Shortcut
Select all text (Ctrl+A), then set line spacing and indent at once using the Paragraph dialog box (Home → Paragraph group → dialog launcher).
Worked Example
1 Formatting a Document from Scratch
STEP-BY-STEP:
1. Set Page Layout:
   - Layout → Page Setup → A4
   - Margins: Top/Bottom 2cm, Left 3cm, Right 1.5cm

2. Add Page Numbers & Footers:
   - Insert → Page Number → Bottom of Page
   - Check "Different First Page" to hide on title page
   - Add Candidate Name & Center Number to Footer

3. Format Paragraphs:
   - Select All (Ctrl+A)
   - Home → Paragraph → Line Spacing: 1.5
   - Special: First Line → By: 1.25 cm
   - Alignment: Justified

4. Set Heading Styles:
   - Title → "Heading 1" style
   - Sections → "Heading 2" style
   - Insert → Table of Contents
Common Pitfalls
Using Enter/Space for Indenting & Formatting
Never use multiple spaces or Enter keys to create indents or force new pages. Manual spaces break when text reflows. Use the Paragraph → Indentation setting and Page Breaks (Ctrl+Enter).
Numbering the Title Page
It is unprofessional to have a "1" on your cover page. Always use "Different First Page" to hide the header/footer on the title page.
Forgetting to Set Margins Before Writing
Set page parameters first. Changing margins later can shift text, break tables, and mess up pagination.
Practical Tasks
Activity 1: Create a Template. Create a document with: A4 page size, margins (top/bottom 2cm, left 3cm, right 1.5cm), line spacing 1.5, first-line indent 1.25cm. Add a Footer with your Candidate Name and Page Numbers (starting from page 2).
Activity 2: Organizing Test Data. Design a table to document test results for a login system. Include columns: Test ID, Input Data, Expected Result, Actual Result. Beneath it, explain why tables are effective here.
Activity 3: Peer Assessment. Swap documents with a partner. Assess using a 1-3 scale for: Headers/Footers (clear?), Margins (correct?), Heading Styles (used properly?). Provide one strength and one area for improvement.
Self-Check Quiz
Q1: Why is the left margin (3 cm) wider than the right margin (1.5 cm) in standard document formatting?
Q2: What is the difference between a first-line indent and a hanging indent?
Q3: How do headers and footers help prevent plagiarism and identify your work?